Poppy Wreath
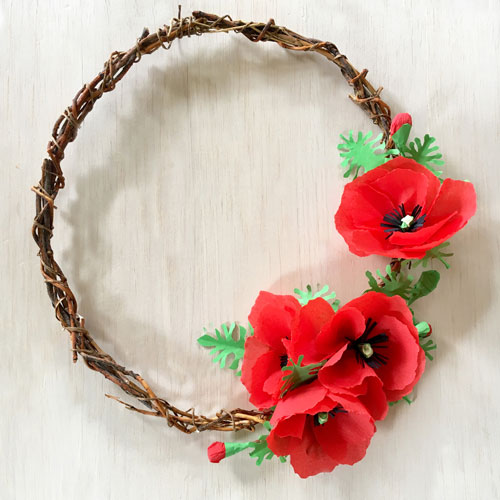
Make a beautiful wreath with paper poppies and leaves. Start by cutting out some leaf shapes, then cut out your flower pieces. To make the stamen, use an XL Glue Dot to secure the wire to the dark green paper. Fold the paper over the wire and use a Mini Glue Dot to secure small strips of light green paper (trim off any excess). Use Craft Glue Dots to secure the black fringed paper to the base of the stem.
Cut a small slit at the base of each petal and join the corners together with a Mini Glue Dot. Place an XL Glue Dot on the flower base and attach the petals. Continue to add petals until the entire Glue Dot is covered. Cut a small slit at the base of the flower and pass the stamen through to complete your poppy. Use Extra Strength Glue Dots to attach leaves and flowers to your natural wreath base.
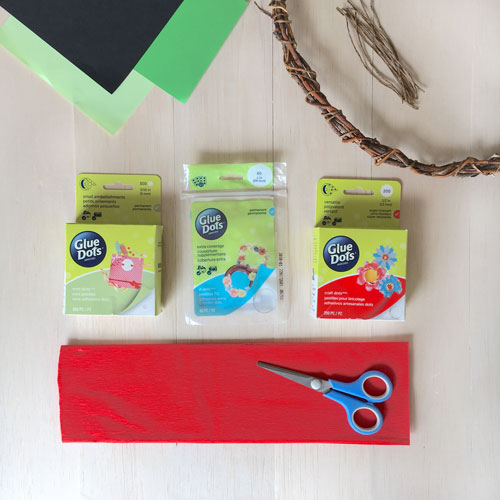
Step 1: Gather your materials
For this project you will need:
- Extra Strength Glue Dots, Mini Glue Dots & Extra Large Glue Dots
- A natural Wreath Base
- Coloured paper in black, light, and dark green
- Red crepe paper
- Florists or paper covered wire
- Scissors
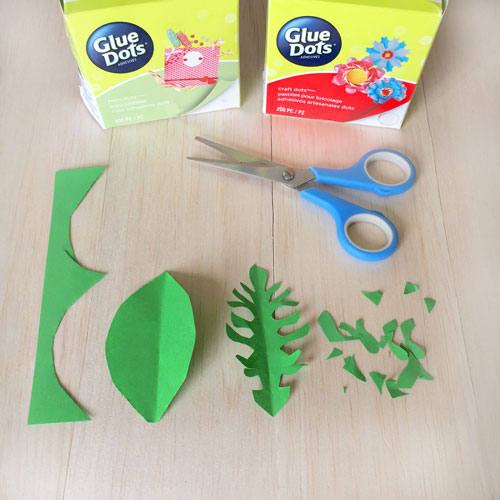
Step 2: Cut your leaves
Cut a basic leaf shape from the green paper and then fold in half. Cut out the poppy leaf shapes.
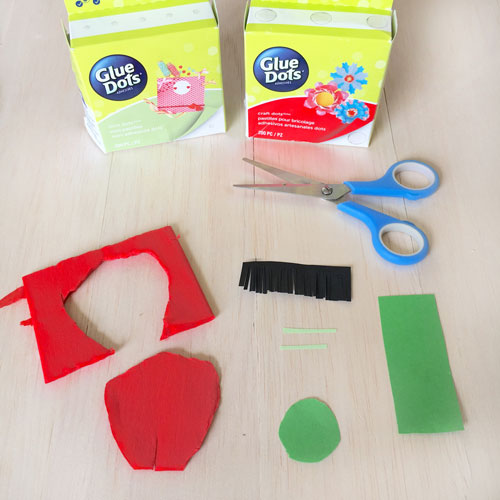
Step 3: Cut the flower parts
You will need a small circle and small rectangle of green paper. Two thin strips of light green. A small section of black, cut with fringes, 8-10 petal shapes, cut out of crepe paper. Refer to picture for shapes and sizes – cutting shapes by hand will give the flower a more natural appearance, no template necessary!
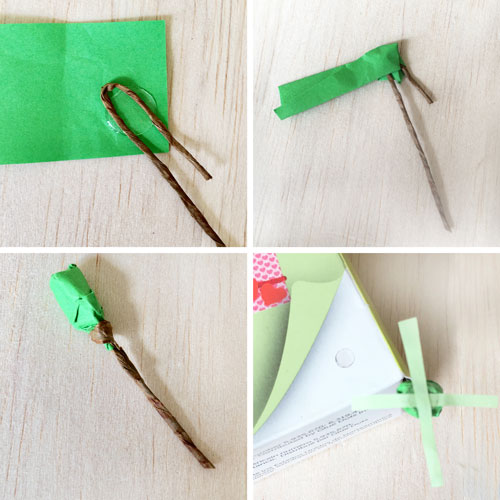
Step 4: Form the stamen
Use an Extra Large Glue Dot to secure a piece of wire to the green paper rectangle. Wrap tightly around the wire and secure to form the central part of the stamen. Finish with a Mini Glue Dot and a cross made from the light green paper. Trim off excess paper.
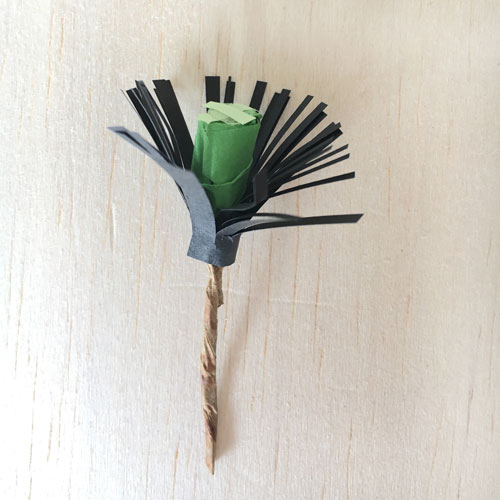
Step 5: Attach the pollen
Use a Glue Dot to secure the fringed black paper to the base of the stamen. Warp around and secure with a second Glue Dot. Gently fold back the fringed paper to frame the stamen.
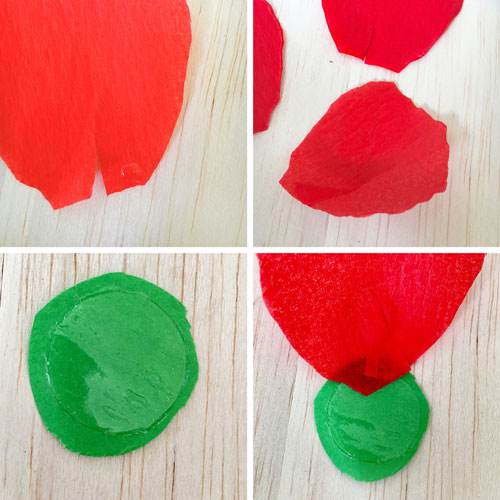
Step 6: Form the petals
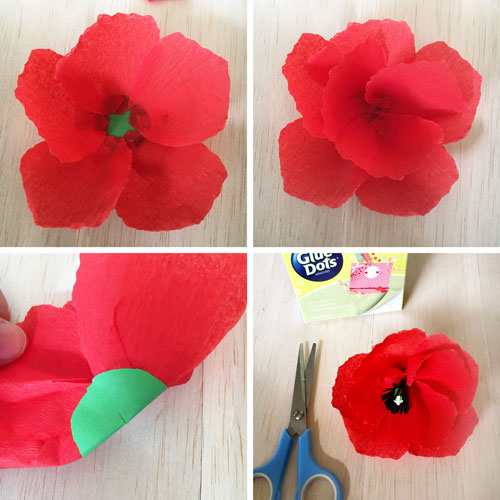
Cut a small slit at the base of each petal and use a Mini Glue Dot to join the corners together. Attach an Extra Large Glue Dot to the circle of paper and attach your petals to the outside edges as you make them.
Step 7: Finish the flower
Continue to add petals until the entire Extra Large Glue Dot is covered. We have used one outer layer, and one inner layer. Cut a small slit at the base of your flower and pass the wire of the stamen through to complete your poppy.
Step 8: Decorate your wreath
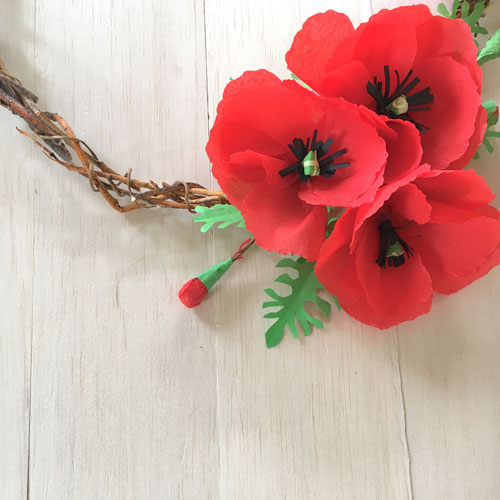
Use Extra Strength Glue Dots to attach leaves and flowers to your wreath base. These work well for a simple asymmetrical style with just a few flowers offset with paper foliage.


